Replacing traditional tile in a walk-in shower doesn’t mean you’re stuck with grout lines, mold maintenance, and weekend grouting projects every few years. Walk-in shower panels offer a streamlined alternative that cuts installation time and long-term upkeep while delivering a clean, modern look. Whether you’re tackling a full bathroom remodel or upgrading a dated shower enclosure, understanding panel options, installation requirements, and material trade-offs will help you make the right call for your space and skill level.
Table of Contents
ToggleKey Takeaways
- Walk-in shower panels install in hours rather than days, eliminating time-consuming tile grouting and sealing while delivering a modern, maintenance-free shower surface.
- Available in acrylic, PVC, laminate, and composite materials, walk-in shower panels range from $30 to $180 per panel and offer diverse design options including faux stone and marble finishes without the cost of traditional tile.
- Panels require minimal maintenance with no grout lines to harbor mold, reducing long-term costs by 20–30% compared to tile work and requiring only regular cleaning with a squeegee and mild detergent.
- DIY installation is achievable for homeowners with basic tools—a competent DIYer can panel a standard three-wall shower in 4–6 hours using adhesive-only installation and snap-fit trim channels.
- Proper substrate preparation, careful measurement, and quality cutting techniques are essential for successful walk-in shower panel installation, with textured or matte finishes recommended for homes with hard water.
What Are Walk In Shower Panels?
Walk-in shower panels are large-format wall coverings designed to replace traditional tile, cement board, and grout in shower enclosures. Most panels measure 48 to 96 inches tall and 36 to 60 inches wide, allowing installers to cover entire shower walls with minimal seams. They’re typically made from waterproof materials like acrylic, PVC, fiberglass-reinforced plastic (FRP), or laminate composites, bonded directly to existing drywall, cement board, or old tile using adhesive and trim channels.
Unlike traditional tile, which requires waterproof membrane installation, thinset application, grout work, and sealing, panels install in hours rather than days. They’re sometimes called walk-in shower surrounds or walk-in shower walls, depending on whether they’re sold as a kit or individual sheets. Most systems include interlocking or overlapping seams sealed with silicone, plus corner trim and edge profiles to finish transitions.
Panels are not the same as prefabricated shower stalls. A stall is a complete unit with a built-in base: panels are surface material only, installed over an existing shower pan or custom-tiled floor. They work well in both barrier-free walk-in showers and those with low-threshold pans.
Types of Walk In Shower Panels for Your Bathroom
Acrylic and PVC Panels
Acrylic panels are thermoformed sheets, usually 2.5 to 4 mm thick, with a glossy, non-porous surface. They resist mold, mildew, and soap scum better than tile and won’t crack under normal use. Acrylic is lightweight, which simplifies handling and allows adhesive-only installation on sound substrates. It’s available in solid colors, faux stone patterns, and textured finishes. Expect to pay $40 to $90 per panel, depending on size and finish.
PVC (polyvinyl chloride) panels are rigid plastic sheets, typically 5 to 10 mm thick, with a matte or semi-gloss surface. They’re more impact-resistant than acrylic and stand up well to high-traffic family bathrooms. PVC panels often feature tongue-and-groove edges for mechanical locking, reducing reliance on adhesive. They’re sold as individual planks (similar to luxury vinyl plank flooring) or full sheets. Pricing runs $30 to $70 per panel, with DIY-friendly kits including trim and adhesive.
Both materials are Class A fire-rated per ASTM E84 and meet ICC-ES building code standards for wet-area wall assemblies when installed over approved substrates. For homes with hard water, acrylic shows mineral deposits more noticeably than textured PVC.
Laminate and Composite Panels
Laminate panels use a moisture-resistant MDF or phenolic core bonded to a decorative high-pressure laminate (HPL) surface. The laminate layer is the same material used on countertops, durable, heat-resistant, and available in hundreds of colors and patterns. These panels are heavier (10 to 15 pounds per 48″ x 96″ sheet) and require additional blocking or adhesive coverage. They’re a good fit for walk-in showers with full wall coverage in modern or commercial-style bathrooms. Cost: $70 to $150 per panel.
Composite panels blend fiberglass, resin, and mineral fillers for a stone-like appearance and feel. Some products mimic natural marble, travertine, or slate with embossed textures. Composites are thicker (6 to 12 mm) and stiffer than acrylic, reducing flexing on large unsupported spans. They install similarly to acrylic but often ship in narrower widths to reduce weight. Expect $80 to $180 per panel, with premium stone-look finishes at the higher end.
Laminate and composite options typically require trim channels (J-channel, inside corner, outside corner) sold separately, adding $50 to $100 to material costs for an average three-wall enclosure.
Benefits of Installing Walk In Shower Panels
Speed and simplicity. A competent DIYer can panel a standard three-wall walk-in shower in four to six hours, including surface prep and trim. Compare that to tile, which demands waterproofing, layout, setting, grouting, and curing time over multiple days. You can use the shower 24 hours after panel installation once adhesive cures, versus three to five days for tile grout and sealant.
Minimal maintenance. Panels have no grout lines, eliminating the primary vector for mold, mildew, and staining in tile showers. Cleaning requires only a spray bottle, squeegee, and occasional mild detergent. Most manufacturers recommend a quick wipe-down after each use to prevent hard water buildup. No annual grout sealing or periodic regrouting is needed.
Lower long-term cost. While premium panels can rival mid-grade tile in upfront expense, they eliminate recurring costs for grout maintenance, mold remediation, and re-caulking. Homeowners using professional installation services report total project costs 20 to 30% lower than comparable tile work due to reduced labor hours.
Design flexibility. Panels are available in colors and patterns that would be prohibitively expensive in tile, including large-scale marble veining, metallic finishes, and seamless solid colors. Because panels cover large areas without interruption, the finished shower reads as one continuous surface rather than a grid of tile.
DIY-friendly. Most panel systems are designed for owner-builder installation, with adhesive application, scribe-and-cut fitting, and trim snapping into place. No troweling, leveling, or grout float skills required. A circular saw or jigsaw with a fine-tooth blade handles cuts: a utility knife scores and snaps thinner PVC panels.
How to Choose the Right Walk In Shower Panels
Assess your substrate. Panels install best over smooth, sound surfaces: drywall (purple board or green board rated for wet areas), cement board, or existing tile in good condition. If your walls have water damage, soft spots, or mold, address those issues first. Panels are waterproof, but they don’t fix structural problems underneath. Studs should be on 16-inch centers to prevent flexing: add blocking if spacing is wider.
Match panel size to wall dimensions. Measure wall height and width, accounting for shower pan lips, ceiling slopes, and window or niche openings. Panels are easier to handle and install when they minimize seams. For example, an 80-inch-tall wall is better served by a single 96-inch panel trimmed to fit than by stacking two shorter panels with a horizontal seam at eye level. Order 5% extra for cutting waste and future repairs.
Consider your design goals. Solid colors and subtle textures suit contemporary or minimalist bathrooms: faux stone or marble patterns fit transitional and traditional styles. Be aware that busy patterns can make small showers feel cramped. If you’re planning a bathroom renovation, view physical samples in your actual shower lighting, glossy finishes amplify reflections, while matte surfaces diffuse light.
Evaluate water hardness and usage. Homes with hard water should lean toward textured or matte-finish panels, which hide mineral deposits better than high-gloss acrylic. Households with kids or high shower traffic benefit from thicker, impact-resistant PVC or composite panels.
Check fire and building code ratings. Verify that your chosen panels meet ASTM E84 Class A or B flame spread requirements and ICC-ES approval for wet-area wall coverings. Most reputable manufacturers list compliance in product specs. Some jurisdictions require a permit for shower remodels that involve plumbing or structural changes: panels-only projects over existing substrates typically do not, but confirm with your local building department.
Budget for trim and adhesive. Factor in trim channels, corner pieces, and panel adhesive (often proprietary or recommended by the manufacturer). A typical three-wall shower requires 20 to 30 linear feet of trim and one to two tubes of adhesive per panel. Total accessory cost: $75 to $150.
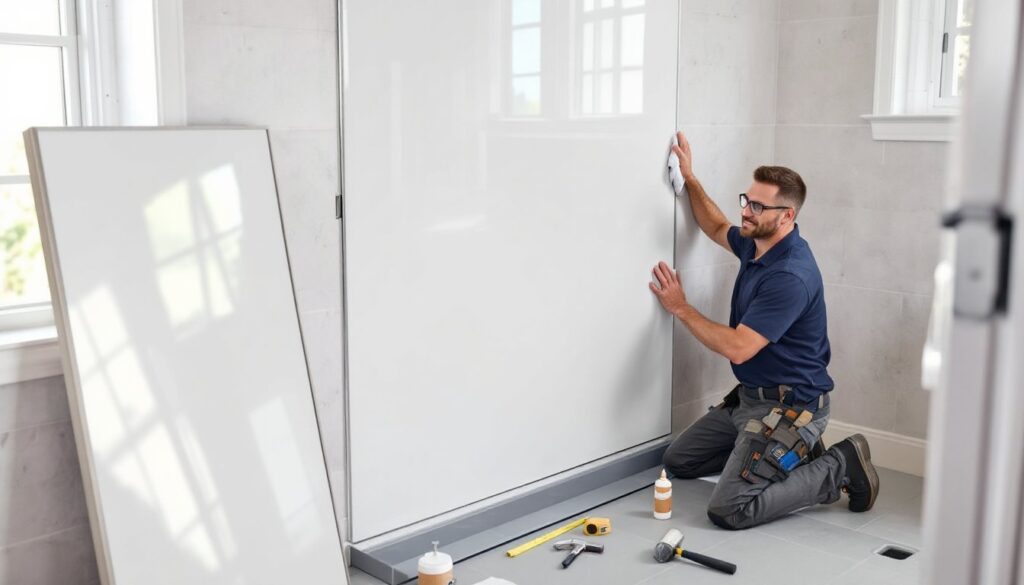
DIY Installation Tips for Walk In Shower Panels
Prep the surface. Remove old caulk, clean with TSP or a degreaser, and let walls dry completely. Sand glossy tile or paint to improve adhesive bond. Fill any dents or gouges with patching compound and sand smooth. Walls should be flat within 1/8 inch over 8 feet: panels will telegraph imperfections.
Dry-fit and plan seams. Lean panels against walls to visualize layout and seam placement. Plan seams to land in corners or at plumbing fixtures when possible. Mark cutouts for showerheads, valves, and niches using measurements from fixed reference points (floor, adjacent wall). Double-check all measurements, cutting panels short is a costly mistake.
Cut carefully. Use a fine-tooth blade (60 to 80 teeth) in a circular saw or jigsaw to minimize chipping. Cut with the finished side up if using a jigsaw, finished side down for a circular saw. For plumbing penetrations, drill pilot holes at corners, then jigsaw the opening. Leave 1/4-inch clearance around pipes for trim escutcheons. Many DIY guides recommend scoring thinner PVC panels with a utility knife and snapping along a straightedge.
Apply adhesive correctly. Follow the manufacturer’s instructions for adhesive type (usually a panel-specific construction adhesive or two-part epoxy). Apply adhesive in vertical beads spaced 6 to 8 inches apart, avoiding the perimeter where excess can squeeze out. Press the panel firmly, starting at one edge and working across to minimize air pockets. Use temporary spacers (paint sticks work) to maintain a 1/8-inch gap at the floor and ceiling for expansion.
Install trim and seal seams. Snap or glue trim channels over panel edges, inside corners, and outside corners. Run a bead of 100% silicone caulk (not acrylic latex) along all seams, corners, and the floor/wall joint. Tool the caulk smooth with a wet finger or caulk tool. Let cure per manufacturer’s directions before use, typically 24 hours.
Safety and tools. Wear safety glasses, dust mask, and gloves when cutting panels. Ventilate the space if using solvent-based adhesive. Essential tools: circular saw or jigsaw, tape measure, level, caulk gun, utility knife, straightedge, and drill with hole saw for large penetrations. A helper makes handling full-size panels safer and easier, especially in tight spaces.