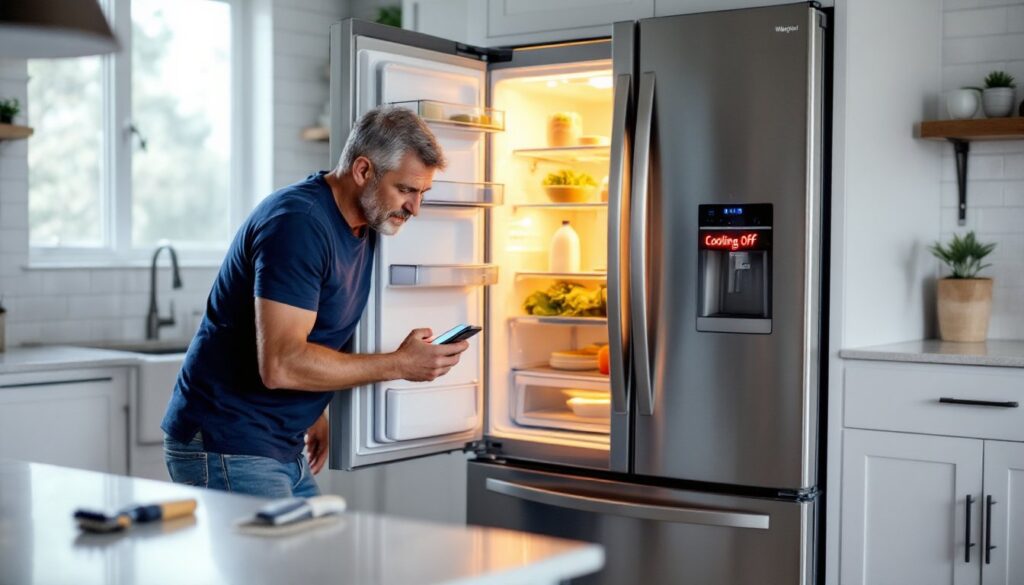
Nothing’s worse than opening your fridge to find lukewarm milk and soggy lettuce. If a Whirlpool refrigerator says “cooling off” on its display, or simply isn’t keeping food cold, it’s usually fixable without a service call. Most cooling problems stem from a handful of common issues: dirty coils, faulty fans, incorrect settings, or worn door seals. This guide walks through the most likely culprits in order of ease, so homeowners can diagnose and fix the problem themselves before calling in a pro.
Table of Contents
ToggleKey Takeaways
- A Whirlpool refrigerator cooling off issue is often caused by accidental activation of Cooling Off mode, dirty condenser coils, blocked vents, or worn door seals—all fixable without professional help.
- Start troubleshooting by checking control settings and verifying temperatures are set to 37°F for the fridge and 0°F for the freezer, then wait 24 hours before rechecking.
- Cleaning condenser coils every 6–12 months can improve cooling efficiency by 20–30% and is the most common DIY fix for a Whirlpool refrigerator not cooling properly.
- Use the dollar bill test on door gaskets to detect air leaks, and clean or replace worn seals to prevent warm air infiltration that forces the compressor to overwork.
- Call a professional for refrigerant leaks, control board failures, or sealed system repairs, as these require EPA certification and specialized tools, and often cost $400–900 or more.
- If repair costs approach half the price of a new unit or your Whirlpool refrigerator is over 12 years old, evaluate whether replacement makes more financial sense than repair.
Common Causes of a Whirlpool Refrigerator Not Cooling Properly
When a Whirlpool refrigerator stops cooling, the issue usually falls into one of five categories: control settings, airflow obstruction, dirty condenser coils, failed mechanical components, or seal leaks.
Control panel errors are surprisingly common. Many Whirlpool models feature a “Cooling Off” or “Cooling On/Off” mode designed for cleaning, moving, or showroom display. If that mode is activated, intentionally or not, the compressor won’t run. The display may show “cooling off” or a similar indicator.
Blocked vents inside the fridge or freezer prevent cold air circulation. Overstuffing shelves or pushing items against rear vents forces the evaporator fan to work harder and can create warm spots.
Dirty condenser coils are the #1 mechanical culprit. Coils coated in dust, pet hair, or kitchen grease can’t dissipate heat efficiently, causing the compressor to overheat or shut down on thermal overload.
Component failure, evaporator fan, compressor, or start relay, stops the refrigeration cycle. These parts typically last 8–15 years, but premature failure happens.
Worn door gaskets let warm air seep in constantly, overworking the system and raising internal temps by several degrees. Even a small gap along the hinge side can cause noticeable cooling loss.
How to Check and Adjust Your Whirlpool Refrigerator Temperature Settings
Start here, it takes 30 seconds and solves a surprising number of cases.
Check for “Cooling Off” mode. On models with digital controls, press and hold the “Lock” and “Filter Reset” buttons simultaneously for 3–5 seconds. Some units require pressing the temperature up/down arrows together. Consult the user manual (usually available as a PDF on Whirlpool’s support site) if unsure. When cooling mode is disabled, the display often shows “Cooling Off” or “OFF” in the temperature field. Re-enable it using the same button combination.
Verify set temperatures. The refrigerator compartment should be set to 37°F, and the freezer to 0°F. These are the FDA-recommended temps for food safety. Whirlpool digital panels usually show current temp and set temp, don’t confuse the two. If the set temp is correct but the current temp is 10°F higher, the problem isn’t the control.
Give it time. After adjusting settings or turning cooling back on, wait 24 hours before rechecking. Refrigerators don’t cool instantly, especially if they’ve been off or the door’s been open frequently.
Test with a standalone thermometer. Built-in displays can drift or fail. Drop an appliance thermometer (the dial or digital kind) in a glass of water on the middle shelf. Check it after 8 hours. If it reads above 40°F and the control is set correctly, move to mechanical troubleshooting.
Inspecting the Condenser Coils for Dust and Debris Buildup
Dirty condenser coils are the most common fixable cause of poor cooling. Coils release heat absorbed from inside the fridge: when they’re clogged, heat can’t escape and the compressor cycles inefficiently or shuts down.
Locate the coils. On most Whirlpool models, coils are behind a rear access panel (unscrew and lift off) or beneath the fridge behind a kickplate grille at floor level. Older models have exposed coils on the back.
Unplug the fridge. Always disconnect power before cleaning. Pull the unit away from the wall if accessing rear coils, have a helper if it’s a side-by-side or French door model (these weigh 250–350 lbs).
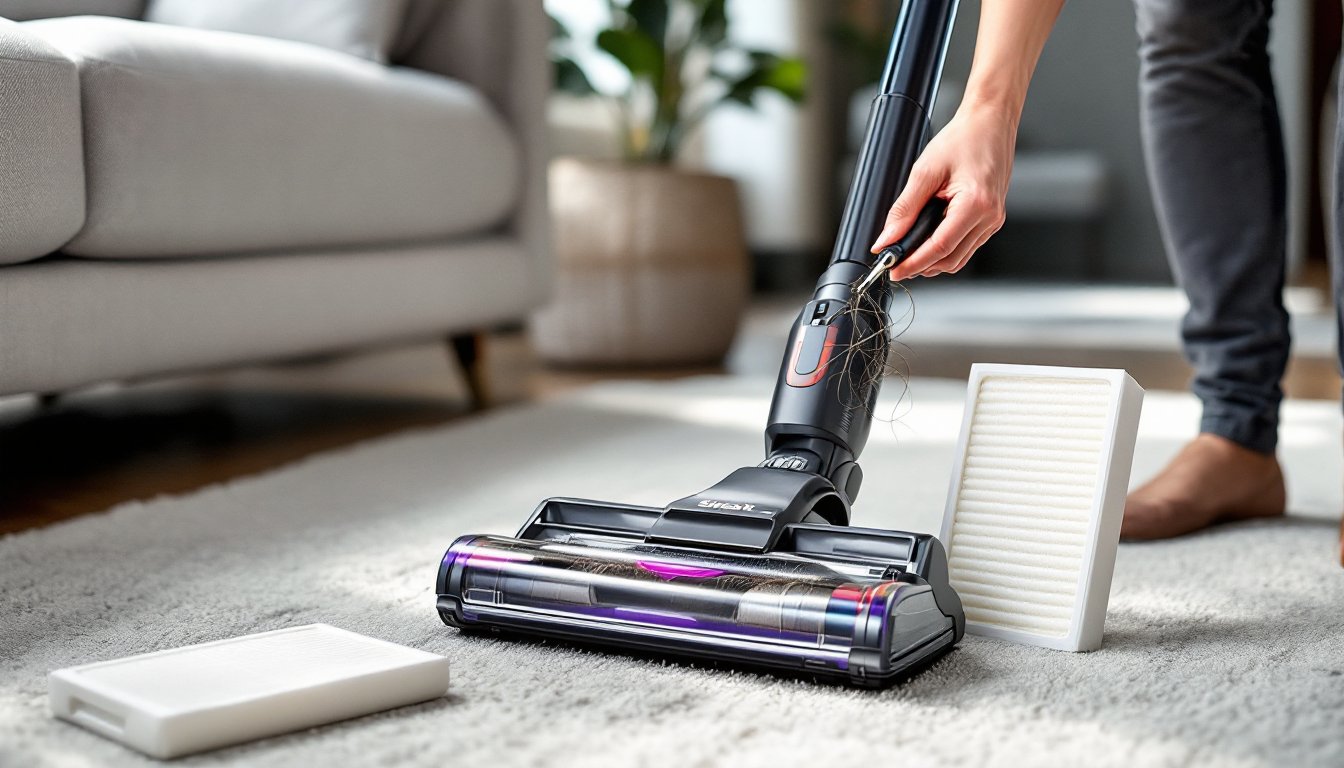
Vacuum first. Use a shop vac or a household vacuum with a crevice tool attachment. Work slowly along the coil fins, which are delicate. Don’t bend the fins, they’re thin aluminum and damage easily.
Brush stubborn buildup. A coil cleaning brush (sold at hardware stores for $8–12) has long, flexible bristles designed to reach between fins. Brush gently in the direction of the fins, not across them. According to appliance testing labs, coil cleaning can improve cooling efficiency by 20–30% on neglected units.
Clean every 6–12 months. Homes with pets, heavy cooking, or poor ventilation need more frequent cleaning. Mark it on the calendar along with HVAC filter changes.
Reassemble and test. Replace panels, plug in, and wait 24 hours. The compressor should run quieter, and temps should drop.
Testing the Evaporator Fan and Compressor Function
If coils are clean and settings are correct but the fridge still won’t cool, the evaporator fan or compressor may have failed.
Listen for the evaporator fan. Open the freezer door and locate the interior rear panel (usually held by screws or clips). The evaporator fan sits behind it and should run whenever the compressor runs. Press the door switch (a small button along the door frame that turns off the light when closed) to trick the fridge into thinking the door is shut. You should hear a steady hum or whir. If silent, the fan motor is dead.
Safety first: Unplug before removing panels. Wear work gloves when handling sheet metal edges.
Check the compressor. The compressor is a black cylindrical component at the bottom rear of the fridge. It should feel warm (not hot) and vibrate slightly when running. Unplug the fridge, wait 5 minutes, then plug it back in. Listen for a hum or click. If you hear a click but no hum, the start relay (a small plastic box plugged onto the compressor) may be bad. Relays cost $15–30 and snap on/off without tools, but misdiagnosis is common.
Test the relay (optional DIY). Unplug the fridge, pull the relay off the compressor, and shake it. If it rattles, the internal contacts are broken, replace it. If silent, it may still be good. Swap it only if you’re confident: incorrect relay replacement can damage the compressor.
Compressor failure is the worst-case scenario. If the compressor is silent, won’t start, or cycles on/off every few minutes, it’s likely failed. Replacement costs $400–800 in parts and labor, often more than half the price of a new fridge. At that point, consider replacement, especially if the unit is over 10 years old.
Fixing Door Seal Issues That Cause Cooling Loss
A worn or dirty door gasket lets warm air infiltrate constantly, forcing the compressor to run overtime and still struggle to maintain temp.
Inspect the gasket. The rubber seal runs around the perimeter of each door. Look for cracks, tears, hardening, or visible gaps when the door is closed. Run your hand along the seal while the door is shut, if you feel cold air leaking, the seal is compromised.
Do the dollar bill test. Close the door on a dollar bill so half sticks out. Try to pull it out. You should feel resistance. Repeat at 8–10 points around the door. If the bill slides out easily anywhere, the seal isn’t tight.
Clean the gasket first. Dirt and food residue prevent proper contact. Wipe the gasket with warm water and a drop of dish soap, then dry thoroughly. For many modern kitchens with stainless appliances, a clean gasket also improves appearance.
Adjust door alignment. Whirlpool fridge doors often have adjustment screws at the top and bottom hinges. Loosen the screws slightly (usually 5/16″ hex head), shift the door until the gasket seats evenly, then retighten. A level helps confirm the door isn’t sagging.
Replace the gasket if needed. OEM gaskets cost $50–120 depending on model. Order by model number (on the label inside the fridge). Installation is straightforward: lift the old gasket out of the retainer channel and press the new one in, starting at the top corners. Some designs use screws, just swap them over.
Pro tip: Soak the new gasket in warm water for a few minutes before installing. It becomes pliable and seats easier.
When to Call a Professional for Whirlpool Refrigerator Repairs
Some repairs are beyond the scope of DIY work, either due to complexity, specialized tools, or refrigerant handling regulations.
Refrigerant leaks require an EPA-certified technician. If the compressor runs but produces zero cooling, or you see frost only on part of the evaporator coil, suspect a leak. DIYers cannot legally buy or handle refrigerant (R-134a or R-600a) without certification.
Control board failures are tricky to diagnose without a multimeter and schematic. If the display is dark, flashing error codes, or behaving erratically after a power surge, the main board may be fried. Boards cost $150–300, but misdiagnosis is common, pros can test before ordering parts.
Sealed system work, compressor replacement, evaporator swaps, or capillary tube repairs, requires brazing, vacuum pumps, and refrigerant recovery equipment. Expect to pay $400–900. At that price point, evaluate repair vs. replacement. If the fridge is over 12 years old or a basic model, replacement is often smarter.
Warranty coverage. Whirlpool offers a 1-year full warranty and a 5-year sealed system warranty (compressor, evaporator, condenser, tubing). Check purchase date and warranty docs before paying out of pocket. Extended warranties or homeowner’s insurance may also cover appliance repairs.
Safety concerns. If you smell burning plastic, see sparks, or hear loud grinding/banging, unplug immediately and call a tech. Don’t attempt live electrical diagnostics without proper training.
For design-focused homeowners planning a kitchen remodel, factor appliance age and reliability into timing, it’s easier to replace a fridge during a renovation than mid-summer when it dies unexpectedly.
Conclusion
Most Whirlpool refrigerator cooling issues trace back to simple fixes: disabling “Cooling Off” mode, cleaning condenser coils, or replacing a worn door seal. Work through the easy checks first, settings, airflow, and coils, before diving into mechanical diagnostics. When repairs approach half the cost of a new unit or involve refrigerant work, get a pro estimate and weigh options. Keep coils clean, monitor door seals, and a Whirlpool fridge should deliver 12–18 years of reliable service.